Showing posts with label Cut Of The Matter. Show all posts

Friday, 25 April 2014

Fabric Friday IX

Hello! Miss me a lil? I sure did miss blogging but try as I may I just couldn't get past all the stuff I had on my plate.
It's another edition of Fabric Friday whoop! And today, I do have some variety. Let me know if you likey!

Wax - bijou wax

Plaid 


Daviva

Daviva

Daviva 

Daviva


And a sneak peek of what became of the daviva lol! You need to have seen me at the daviva store, I was like a kid in a candy store! Cool stuff. And yes, I still have a phobia for photos :)


Tuesday, 1 April 2014

Sew Along Update - Finished Dress!


Top of the morning to you all! Hope you had a great night? So as I told you on my last sew along post, I'll be posting the frontal and back views of my finished clipper dress. Remember all that was left was fixing the zipper, underlining, and joining bodice to skirt right?


Notice I used a brooch in the last photo? You like?
talk to you guys shortly, have a productive day ahead!

Hugs.


Monday, 10 March 2014

Sew Along Update.

Why do I feel like a student coming in late to class, walking face down as she searches for a seat?? Hmm,..... Ok so had a lil trip...now I'm back.... and also somewhere in between getting settled and tydying up work issues, I managed to get some of my guilty pleasures...FaBRICS! Would be sharing those with you Fabric Friday although I also got some new stock for TSN fabric Storeso be sure to kelp checking there as I'll upload anytime now. You might be wondering, would I ever get to sew all these fabrics and would you ever get to see my creations eh? Well you'll have to keep those fingers crossed cos I got surprises for ya!
Now, in my last sew along post I concluded with the skirt and that means we tackle the lapel next yeah?
- You spread out your bodice (you ought to have joined front bodice to back bodice at this point), measure center to center.


Tuesday, 25 February 2014

Sew Along Update!

Hello!!!
So I thought to put together some photos from previous sew along projects while I round up compilations of the on- going sew along exercise I'm having here on the blog. 
Have fun viewing them!

Sunday, 5 January 2014

Tube Top Tutorial with Fusible Bust pad - II


Hello folks and happy new year! Did you have fun new year's eve? I know I did. Now I'm actually looking forward to my holidays. It's been work,work,and more work for me :-) I need it! anyways, let me quickly upload this post before I bore you to tears lol!  -  here's a continuation of our tube top  tutorial.
Now, after you must have cut out your lace fabric, and underlining, you layer it like so.
Lace and underlining1.

Friday, 27 December 2013

Tube Top Tutorial With Fusible Bust Pad - I

 Hello you!
So for those of you who would be making wrapper blouses, skirt bLouses and the like, here's how you can apply fusible bust pads to your bust cups. If you are conversant with the nigerian blouses as seen on ladies wearing different asoebi styles, you would definitely come across blouses that make the blossom look absolutely wonderful! *clears throat*
As you can see, I've cut up by bust cups. Along with princess seams. You can go through my tube top and princess seam posts here and here
 Here, I'm using a lace fabric for ease of understanding.
You cut up your main fabric, your underlining (if you are using lace,you should have two sets of underlining as one set would be directly facing the lace and that is what people would see from the outside)

Thursday, 26 December 2013

Tube Top Tutorial

Compliments of the season guys! Hope you're enjoying the holidays? Well, I can't really say that I am because I'm still working *sad face* Anyways, I'll skip all the talk and get right to the business of the day.
So today I'll be showing you how you can create a 'bust cup' for your tube dresses,tops, African wrapper blouses and so on! Note though, that you can also merge this technique with the same technique used in making Princess seams as seen here when you want to make dresses, blouses, etc.
For those of you who don't have  the slightest, of what I'm gibbering about, I'll show you a photo :-)


Saturday, 21 December 2013

Tube Top Tutorial With Fusible Bust pad - Intro

Hello you! Hope you are doing a-ok? well for me, I had quite an eventful/tiring day today but all the same let me begin the wrapper blouse tube top post shall I?
So here goes!

You'll need:
Lace fabric
Underlining
Underlining(to place directly underneath your lace)


Sunday, 26 May 2013

Sika Scope Wrap Dress Sew - Along #6> Preparing The Underlining For The Bodice.


Hello again! busy day it is! now this post comprises of : 
1. preparing the bodice underlining
2. shaping the bodice

Saturday, 25 May 2013

Sika Scope Wrap Dress Sew - Along #4> Sewing/turning out the belts


On this post, we would be making the belts for our wrap. I'll tag the inner belts '1' and the outer ones '2'. We'll need two of each, making four belts. 


Sika Scope Wrap Dress Sew - Along #3 > Sewing the bodice


Following the princess seam tutorial as seen here, cut out yours according to your body measurements.


Monday, 20 May 2013

Princess Seam Tutorial

After I got the first couple of mails regarding princess seams, I decided to post a tutorial here. But then again, I got yet another request from a dear reader on the same, and so I thought to make a 'clearer princess seam post'

The labels 'A', 'E' and 'B' stand for the Apex(nipple or highest point of the bust), Empire (that area under the bust, normally measured from the top of the shoulder to the underbust i.e. where your bra rests), and Bodice (your belly button, normally measured from your shoulder to belly button)

 The determined width would read as technical if I explain it, so I would just advice that you add about 12'' to half your bust line measurement and if you are making a dress, add to your hip measurement. If you are bigger however, feel free to add incremental inches so you don't make errors and waste your fabric.

Fold your fabric in two: measurements used here - bust(34), bodice(17 x 26), empire(27)


At the apex, measure out the 'gap' from one apex to the other. Here I used 8'' as that is my perfect fit or rather 'gap' :-) so you are seeing 4.5'' because the extra 0.5'' makes for seam allowance.


At the bodice, measure out the same 'perfect fit gap', here I used 6''. As you 


connect the dots from bodice to apex

now, I made different lines so you determine how high or low you would prefer your princess seams. Here we would make use of the lowest one (the curve with the arrows). Note that the lower the curve, the pointier the curve at the apex.


 make a 2'' mark from the bodice gap you've created


connect the dots all the way to the apex, following whichever curve you want 


cut out...


open up the pieces and join each side piece to the center piece, sew from the bottom upwards.

xoxo, 
Onnari


Thursday, 6 December 2012

How to create a Princess Seam - Free Hand


Here's a quick and easy way to make a princess seam without using a pattern. This post came as a result of an email i got from a reader who wanted to know how to create one, while making a nicely fitted dress.This is a 'rush - post' so stay tuned for a more detailed post on the cut, sewing, and a completed dress with prominent princess seams, as well as definitions of the term 'princess seams'.


more on the other side...

Tuesday, 11 September 2012

Collar Me Bad


It’s been a rush of events, tasks and activities lately and more so being the start of a new week, a lot of plans to be created and carried out but however, I did make out time to create some fancy detachable collars inspired by my love for all things African as well as vintage. Jump in and see the tutorial cos we are making ‘em together!

Friday, 24 August 2012

Work In Progress pictures of the Arden B jacket

....so here are the pics from the creation process of the Arden b military jacket:


ciao!

Monday, 20 August 2012

70s Inspired Ankara Jacket

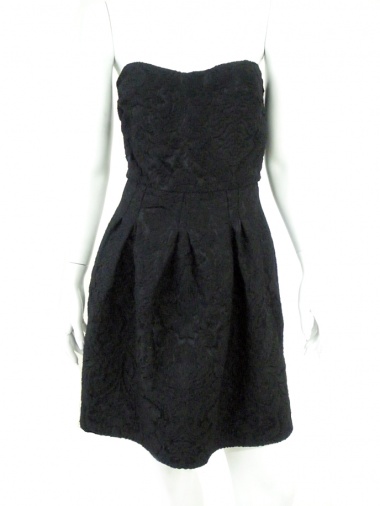
Welcome to my second post and thanks for stopping by. 'Cut Of The Matter' is a feature on sewing projects, and occasionally I would show step-by-step processes of garments being  created, so we are going to be seeing more posts such as this here. (So I wanted to create an embellished ankara jacket with some edge to it, and what could be better than a sophisticated 70s inspired lapel and collar? well nothing I must say! After all Leonardo Da Vinci said 'simplicity is the ultimate sophistication' *wink* So anyway here's the picture of the dress
And here is the finished jacket.


So i decided to modify the lapel by not separating them as it is in the original picture, and embellished it thoroughly lol! Below's as upclose shot.