
Hello all! Hope you having a great week so far? I know I am J well, asides the too
few hours the days seem to have.
So The tutorial we going to be having today is on how to
create a neckpiece using fabric buttons and a minimal amount of beads and trimming,
although I prefer to use more of the beads and trimming when making mine. With
a bib neckpiece, trust me – u can jazz
up a simple outfit ‘just like that!’ so
without further ado, let’s get right to it.

you'll require:
fabric buttons

scraps of fabric

trimming (optional)

now, out of nothing but sheer laziness, i'll show how to create the 'foundation' and then continue with a previous one I already had sewn because i really can't get on a machine right now :-)
they look like this basically after being sewn/before being embellished or accessorized - i'l be making use of the pink.


and from scratch.... fold a square piece of fabric in two, measurements would be determined by what size you actually want.


cut out a piece for the 'neckline'

cut a second piece which would act as the interfacing

iron on some stay to ensure thicknes
after this, u sew up the bottom curve all the way up, and insert string at the top. Please have a look at the finished ones above.
this is what it should look from the inside out, well, if you used white stay of course :-)

then you begin sewing on your buttons

roll up your fabric scraps thus...

and stitch to your bib, it should look this way

same goes for the trimming, only you roll it up in a circle

after you've stitched them all on - beads, buttons, fabric rolls, you should have something like this..notice the top is unfinished

stitch it up neatly in a hem and cover up with trimming or fabric which ever you want. I normally use decorative stitches though but they all serve the same purpose of giving a neat finish.

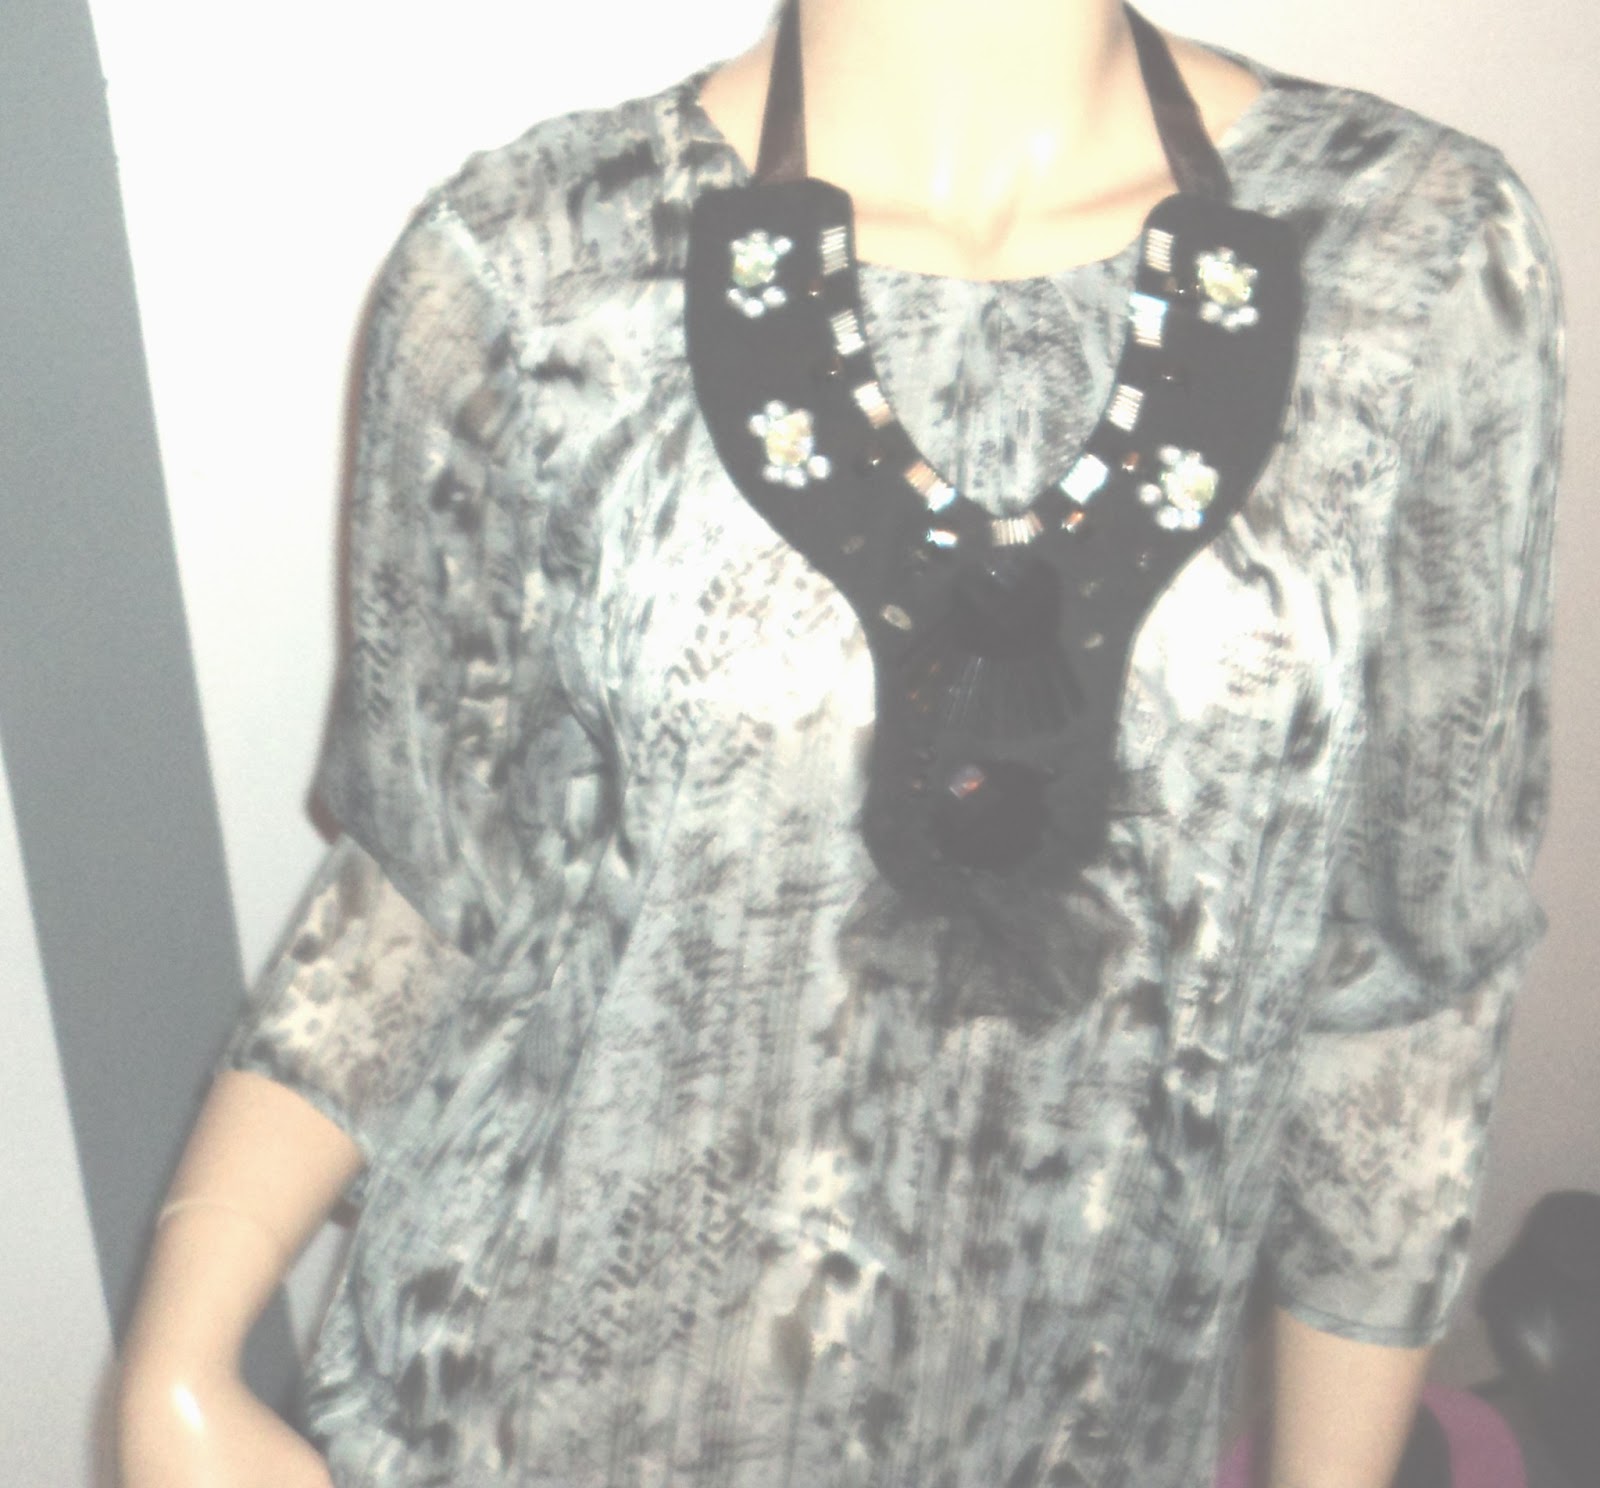
and here's our finished bib!!! have fun making yours and be sure to post pics! would love to see!

here's one I made recently...no buttons involved tough! :-)

xoxo,
Onnari.
I apologize for picture quality!
twitter: @thatssewnaija
Nice one girl! Lovely idea. Thanks for sharing. Muaaaaahs:*
ReplyDeleteIt awesome.. Av really learnt al, tanks
ReplyDeleteI hope mine looks this good when I get the chance to try.
ReplyDelete..This is so inspiring.
Kiz
I hope mine looks this good when I get the chance to try.
ReplyDelete..This is so inspiring.
Kiz
I hope mine looks this good when I get the chance to try.
ReplyDelete..This is so inspiring.
Kiz
I hope mine looks this good when I get the chance to try.
ReplyDelete..This is so inspiring.
Kiz
I hope mine looks this good when I get the chance to try.
ReplyDelete..This is so inspiring.
Kiz
I hope mine looks this good when I get the chance to try.
ReplyDelete..This is so inspiring.
Kiz
I hope mine looks this good when I get the chance to try.
ReplyDelete..This is so inspiring.
Kiz
I hope mine looks this good when I get the chance to try.
ReplyDelete..This is so inspiring.
Kiz
I hope mine looks this good when I get the chance to try.
ReplyDelete..This is so inspiring.
Kiz
I hope mine looks this good when I get the chance to try.
ReplyDelete..This is so inspiring.
Kiz
Onnari welldone. This is great. Thanks for sharing. XtremeBase NL.
ReplyDeleteThank u all fr ur comments! B sure to post pics when u make urs!
ReplyDeletelovely design and concept...keep it up girll you def got talent.
ReplyDeletehttp://www.swisscollectionsstyle.blogspot.co.uk/
Wow nice one will try to make one myself
ReplyDeleteI can see that bib will look so good with a white t shirt and a flared out short pink skirt.
ReplyDeleteYou're absolutely right, and could even step it up a notch with a cropped jacket!
ReplyDeleteI hope mine looks this good when I get the chance to try. ..This is so inspiring. Kiz
ReplyDeletePls how did you get the fabric buttons?
ReplyDeleteU could make ur fabric buttons with the machine built just for that, or u could make 'em manually with just a needle n thread. U can go through my fabric button tutorial.
ReplyDeleteThanks for sharing
ReplyDeleteOnari u re an inspiration. Ur page is at d top of my bookmarked page.
ReplyDeletePls what stay did u use? Is it d thick or d soft one?
Thick is preferable. Thaaanx for book marking and visiting!
ReplyDeleteI love dis tutorial, but can u tell me how to cover the buttons with fabric
ReplyDelete